Sunday, April 24, 2016

Teacher Appreciation Roundup

As the end of the year approaches, teacher appreciation week gears up.  Let's make our teachers feel special and loved for all of their hard work!

Here are some crafts I've come up with for teacher appreciation week:


If you're into crochet, try out the V-Stitch bag, the Heart Drawstring Bag (without the heart, if you prefer, or you could add the flower from below!), or the Shell Market Bag filled with your teachers favorite candy!


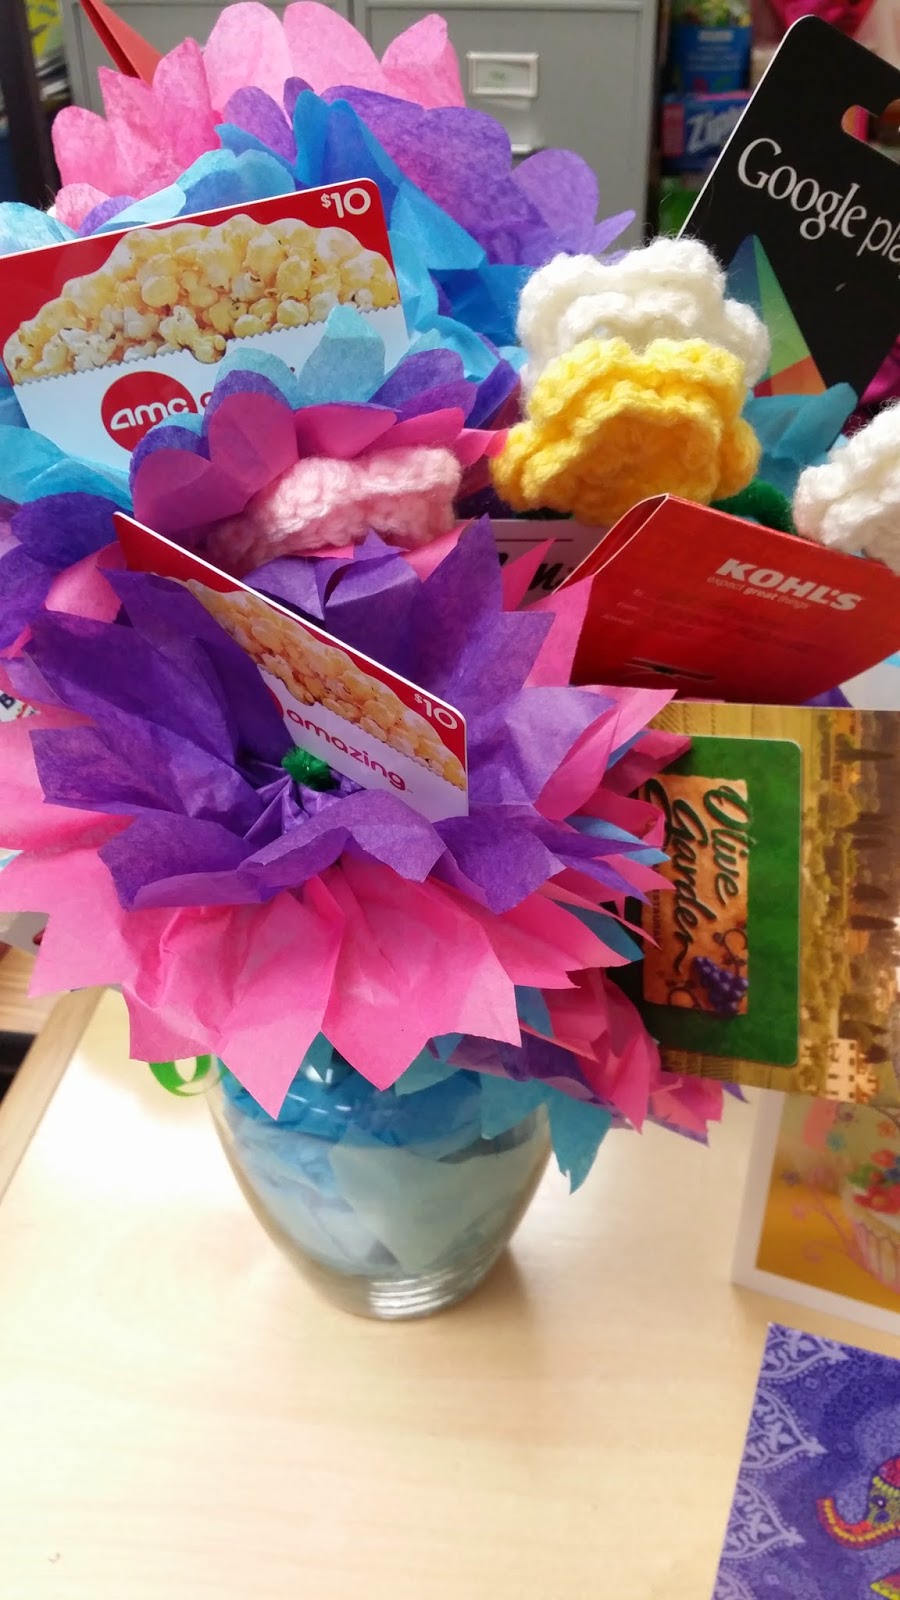
This vase of flowers doubles as a gift card holder.  Pinterest has a ton of pins on how to make paper flowers, and the crochet flower pattern is here.

Pencil/Crayon Vase.  There are some wonderful pins for those, as well.  I made one, but forgot to take a picture of it.  : /


Sunglasses pouch.  I stitched this one by hand.  Here's a little template for you.  Simply cut four pieces of your fabric, as well as two pieces of stuffing (?) And sew them together.  Here's a link to some hand sewn stitches that I've pinned.  (I didn't iron before sewing the pieces together.  Please do that!)

Summer time goodies!  In the past I've done a cup with a straw filled with some of their favorite goodies.


What if you don't have a lot of time (the end of the year really sneaks up on me!), or you just aren't feeling the crafty bug?  Try these little goodie bags.  The kids can decorate a brown paper bag, and just stick some thoughtful little somethings in. 

I'm sure there are some things I've missed, feel free to check back on previous posts, or hit up my Pinterest page.  I've hoarded tons of stuff over there that you may get some use out of.

Happy gifting!

Sunday, April 17, 2016

Ruffle Market Bag


You guys know how much I love bags, right?  I have bags to hold bags that will hold bags.  It's ridiculous.  So, here's another bag pattern.  Because I just can't get enough!

I made this bag a couple of years ago for a student teacher, when she was leaving our classroom.  I filled it full of teacher-type stuff for her new classroom.

You can get the pattern HERE.

NOTE:

  • If you want to make it wider, continue to increase the bottom to the size you want  (likewise to make it smaller, crochet only a few rounds of the bottom).
  • If you want to make it taller, keep on going with it.  It's all up to you!
Enjoy!

Sunday, April 10, 2016

New Planner Pages

In honor of resurrecting my real estate career, I decided I needed some new planner pages.  Something that would seamlessly incorporate home and work.  So, I whipped up these beauts, and I thought I'd share them with you.

B/W Planner Pages

B/W To Do List

I like that they have room for my schedule, as well as some reminders for dinner, chores, and notes.  I opted for the black and white style, in hopes of bringing elegance and simplicity to my pages.  Sometimes I feel overwhelmed by too many colors and stickers and such.  Sometimes I need simple.  These pages accomplish just that.

Overall, I am very happy with them, and I hope you are, too!  If you want them in a different color, just let me know, I can easily whip them up.

See ya!

Sunday, April 3, 2016

Be Gone, Winter Clothes!

I am so excited!  It's finally spring-time!  Winter didn't last long here, I think I wore a sweater all of four times the entire season, and tennis shoes a handful of times, but it's finally getting to the warm weather that I looove!

Living in a not-so-tiny tiny house ( we went from almost 3000 square feet of space to 1000), I have to be creative with storage solutions.

We're currently working on renovating, and incorporating storage solutions that are inspired by those tiny house shows on TV.

Until then, here's how I pack up the winter sweaters to get them out of the way.  I used a large garbage bag for the jackets, but the shirts are a different story. 

Have you heard of those bags that you can vacuum out the air, leaving a flat plastic bag full of clothes?  Those came in very handy when we moved (more moving tips to come!), and I saved them for just such an occasion.

If you can roll up the garments, I've found it will hold more!  Start at the bottom of the shirt, and just roll. 
Once you've rolled them up, stack them Tetris-style in the bag (don't over-fill!  It can rupture the bag).  I ran out of room with three shirts left, so I put them in flat on top of the rolled up shirts. 


Ta da!  Now all you have to do is vacuum out the air.  (I found a hole in the bag, so mine didn't vacuum out, but it still works great to hold the clothes so I can get them stored out of the way!

Do you have any secret tips for storing away winter clothes?